Yesterday, FlowMattic released version 5.1.0, which has two features I am really excited about. I will be doing videos on Email Templates, the headline feature of 5.1.0, which comes first.
This post ist just to put some of the infromation for the vide
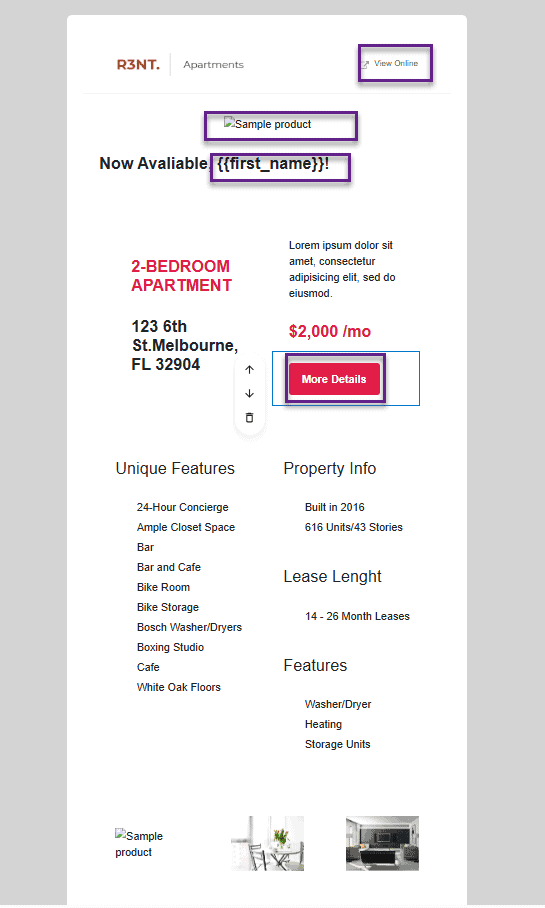
I found a suitable email template for the video, which can be found here and I began by building it out in flowmattic The finished flowmattic version used dynamic data for the view online, more details, unsubscribe and the headline photo as well as a new listing {{first_name}} dynamic data.
Once that was built which a sample can be seen below everything with a purple box is dynamic too.

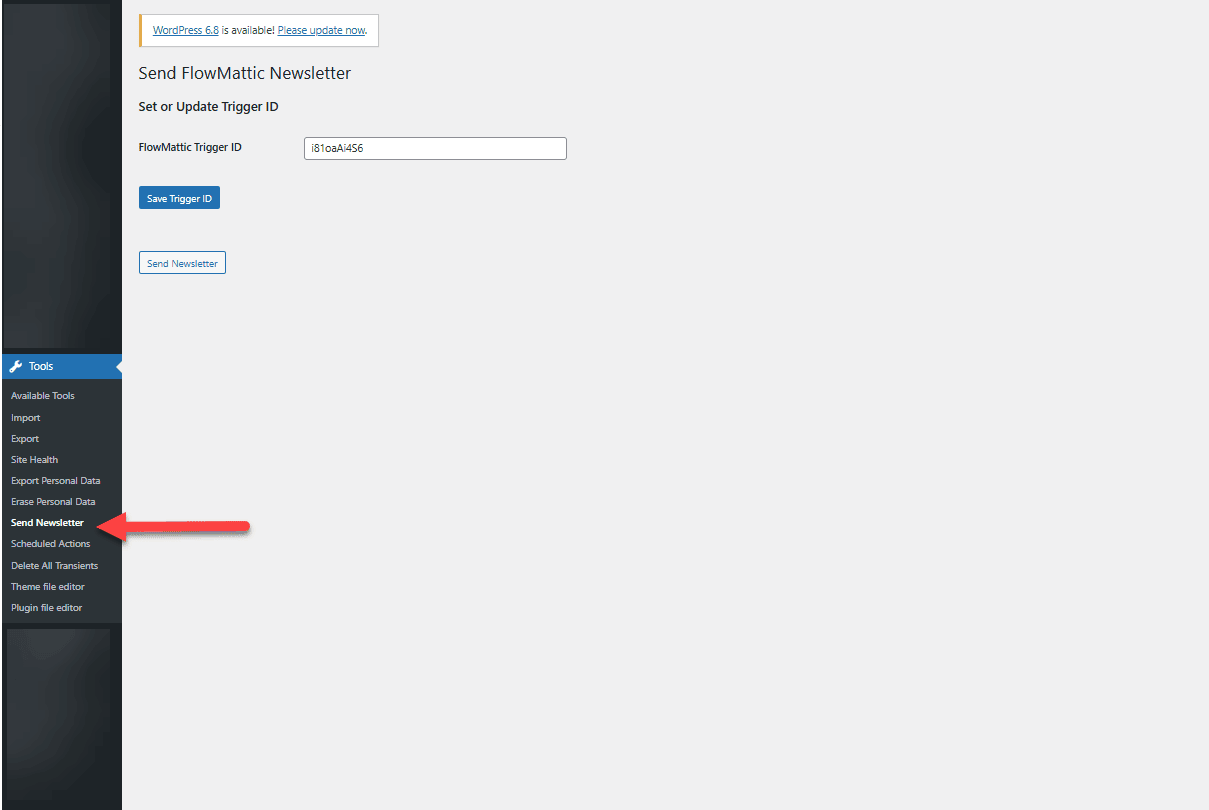
I then began building out our workflow, which I decided to trigger using a custom menu using a custom action trigger in flowmattic you can see what that looks like below

The code for this menu is in the below codebox
<?php
add_action('admin_menu', 'custom_flowmattic_menu');

function custom_flowmattic_menu() {
    add_submenu_page(
        'tools.php',
        'Send FlowMattic Newsletter',
        'Send Newsletter',
        'manage_options',
        'send-newsletter',
        'render_flowmattic_newsletter_page'
    );
}

function render_flowmattic_newsletter_page() {
    // Handle form submit to save trigger ID
    if (isset($_POST['save_trigger_id']) && check_admin_referer('save_trigger_id_action')) {
        $new_trigger_id = sanitize_text_field($_POST['flowmattic_trigger_id']);
        update_option('custom_flowmattic_trigger_id', $new_trigger_id);
        echo '<div class="updated"><p>Trigger ID saved successfully.</p></div>';
    }

    // Handle "Send Newsletter" button
    if (isset($_POST['send_newsletter']) && check_admin_referer('send_newsletter_action')) {
        $trigger_id = get_option('custom_flowmattic_trigger_id');

        if ($trigger_id) {
            $data = array(
                'key' => 'value' // You can customize this
            );
            do_action('flowmattic_trigger_workflow', $trigger_id, $data);
            echo '<div class="updated"><p>Newsletter sent successfully using Trigger ID: ' . esc_html($trigger_id) . '</p></div>';
        } else {
            echo '<div class="error"><p>No trigger ID set. Please save one first.</p></div>';
        }
    }

    // Get saved trigger ID
    $saved_trigger_id = get_option('custom_flowmattic_trigger_id', '');
    ?>
    <div class="wrap">
        <h1>Send FlowMattic Newsletter</h1>

        <form method="post">
            <?php wp_nonce_field('save_trigger_id_action'); ?>
            <h2>Set or Update Trigger ID</h2>
            <table class="form-table">
                <tr valign="top">
                    <th scope="row">FlowMattic Trigger ID</th>
                    <td><input type="text" name="flowmattic_trigger_id" value="<?php echo esc_attr($saved_trigger_id); ?>" class="regular-text" required></td>
                </tr>
            </table>
            <?php submit_button('Save Trigger ID', 'primary', 'save_trigger_id'); ?>
        </form>

        <form method="post" style="margin-top: 2em;">
            <?php wp_nonce_field('send_newsletter_action'); ?>
            <?php submit_button('Send Newsletter', 'secondary', 'send_newsletter'); ?>
        </form>
    </div>
    <?php
}
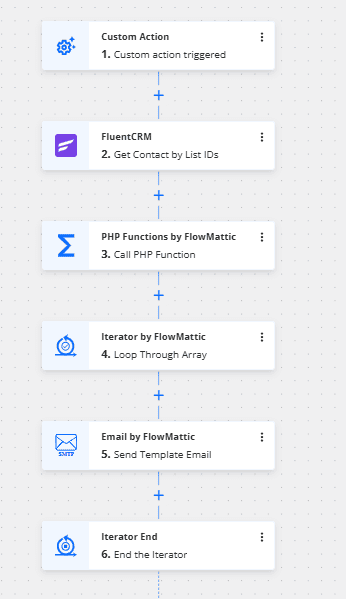
The finished flow is shown below:

I had to use some custom code to extract the list in a more usable format, and i’ve used fluentcrm here but you can get the same data and format from an google sheet or an Air Table using flowmattic too.
<?php
function extract_firstname_email_pairs($params) {
    //error_log("RAW PARAMS: " . print_r($params, true));

    $results = [];

    if (!empty($params['params'])) {
        $raw = stripslashes($params['params']);
        $contacts = json_decode($raw, true);

        if (is_array($contacts)) {
            foreach ($contacts as $contact) {
                if (!empty($contact['email'])) {
                    $results[] = [
                        'email' => $contact['email'],
                        'first_name' => !empty($contact['first_name']) ? $contact['first_name'] : ''
                    ];
                }
            }
        }
    }

   //error_log("FINAL RESULTS: " . print_r($results, true));
    return $results;
}
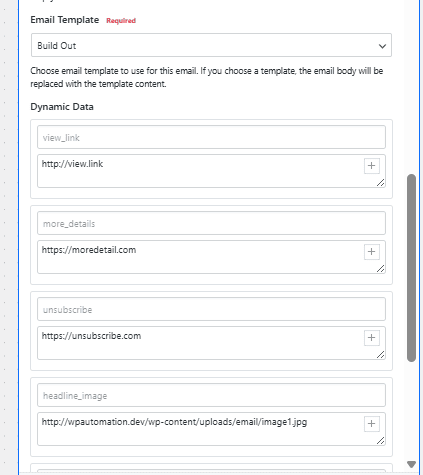
Below is an example of me selecting the email template and also setting some of the dynamic data for the template

You can view the accompanying video to this article here:
